
Learn how to make Red Velvet Cake with a moist crumb, rich cocoa flavor, and creamy cream cheese frosting. Easy step-by-step recipe and expert tips.
How to Make Red Velvet Cake: The Complete Guide to Moist, Bakery-Style Perfection at Home
Introduction
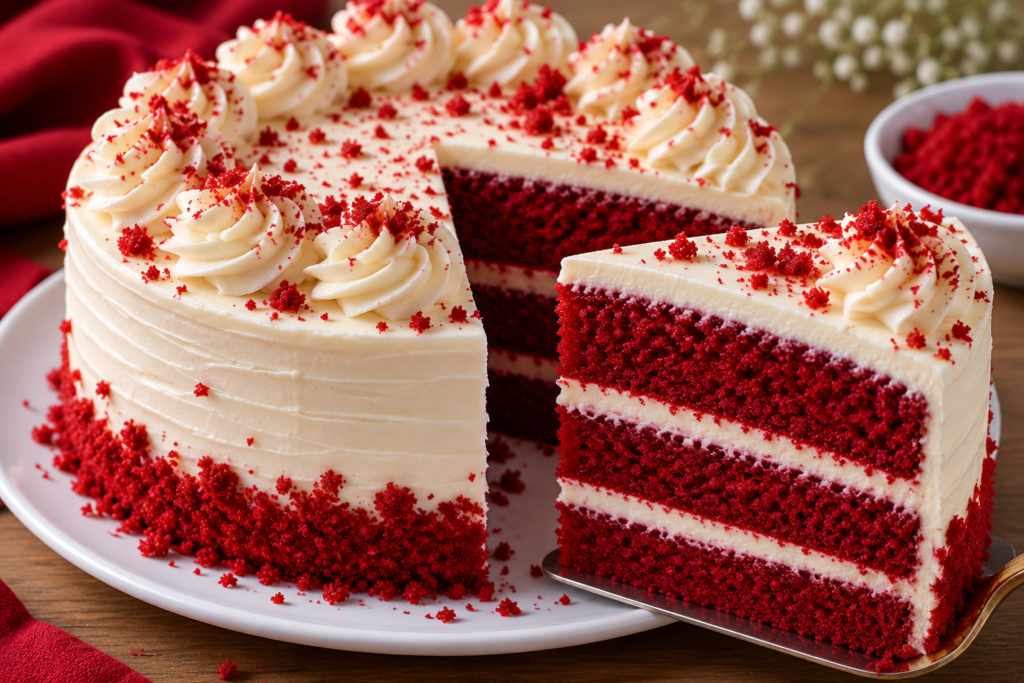
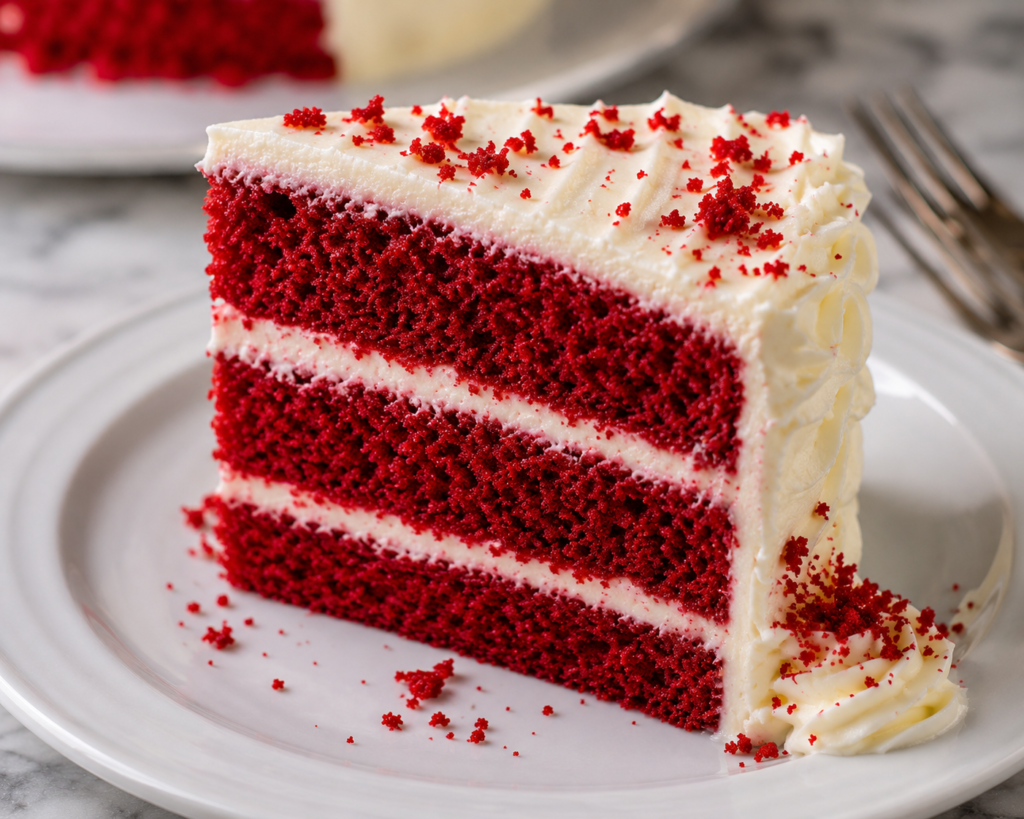
Red Velvet Cake is one of the most iconic desserts in the world. With its striking red color, soft velvety crumb, subtle cocoa flavor, and rich cream cheese frosting, it’s a cake that instantly stands out on any dessert table.
If you’ve ever wondered how to make Red Velvet Cake that tastes just as good as the version from a professional bakery, you’re not alone. Many home bakers struggle with dry cake layers, dull color, dense texture, or frosting that lacks the perfect balance of sweetness and tanginess. Fortunately, these common issues are easy to avoid with the right ingredients and baking techniques.
In this complete guide, you’ll learn everything you need to know about creating the perfect Red Velvet Cake recipe. From understanding what makes Red Velvet unique to mastering moist cake layers and silky frosting, we’ll cover every step. You’ll also discover expert baking tips, delicious variations, storage recommendations, and answers to frequently asked questions.
Whether you’re baking for birthdays, holidays, Valentine’s Day, or special occasions, this homemade Red Velvet Cake delivers bakery-quality results every time.
The Secret to Perfect Red Velvet Cake
Bakery-style Red Velvet Cake comes down to a few important baking principles.
Use Buttermilk
Buttermilk creates a softer, more tender crumb.
Its acidity reacts with baking soda to help the cake rise while contributing a subtle tangy flavor.
This ingredient is essential for authentic Red Velvet texture.
Don’t Overmix the Batter
Overmixing develops gluten, which can make the cake dense and tough.
Mix only until the ingredients are combined.
A gentle approach produces a lighter cake.
Use Room-Temperature Ingredients
Room-temperature eggs, butter, and buttermilk blend more smoothly.
This creates a consistent batter and improves the cake’s overall texture.
Professional bakers rarely skip this step.
Ingredients List
Serves 12
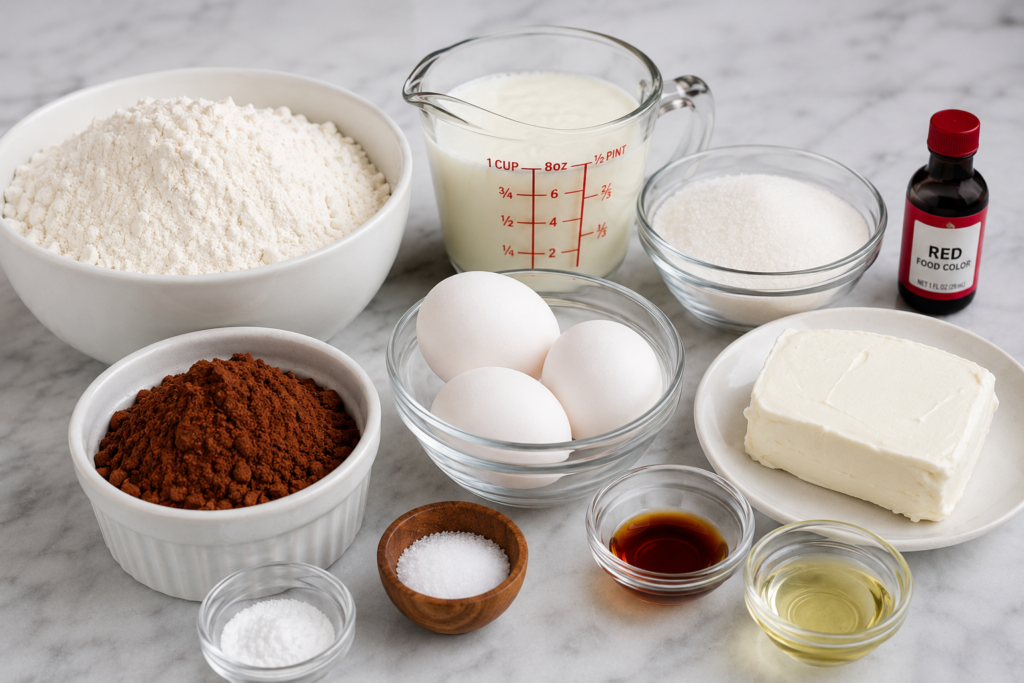
For the Cake
- 2½ cups all-purpose flour
- 2 tablespoons cocoa powder
- 1 teaspoon baking soda
- ½ teaspoon salt
- 1½ cups granulated sugar
- 1 cup vegetable oil
- 2 large eggs
- 1 cup buttermilk
- 2 teaspoons vanilla extract
- 1 tablespoon red food coloring
- 1 teaspoon white vinegar
For the Cream Cheese Frosting
- 16 ounces cream cheese, softened
- ½ cup unsalted butter, softened
- 4 cups powdered sugar
- 2 teaspoons vanilla extract
Optional Garnishes
- Red velvet cake crumbs
- White chocolate shavings
- Fresh berries
- Sprinkles
Ingredient Substitutions
- Gel food coloring can replace liquid food coloring.
- Greek yogurt mixed with milk can replace buttermilk.
- Gluten-free flour blend can be used for a gluten-free version.
Step-by-Step Instructions
1. Prepare the Cake Pans (5 Minutes)
Preheat your oven to 350°F (175°C).
Grease and line two 9-inch round cake pans with parchment paper.
2. Mix the Dry Ingredients (3 Minutes)
In a large bowl, whisk together flour, cocoa powder, baking soda, and salt.
Set aside.
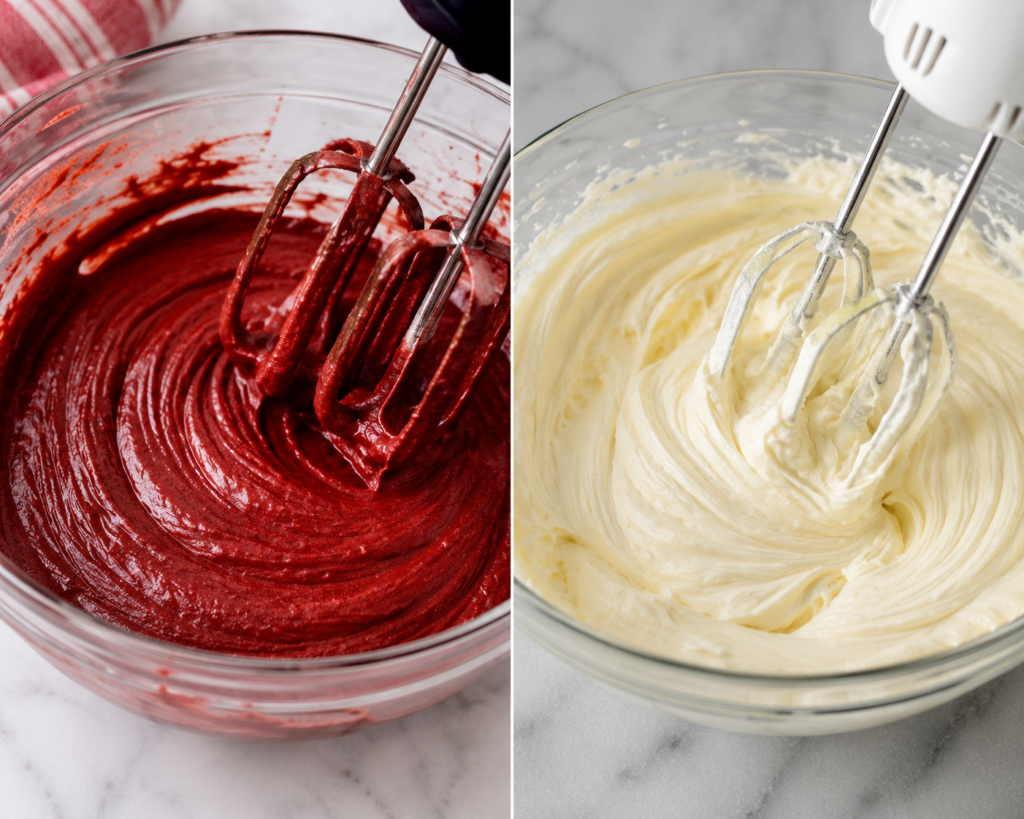
3. Combine the Wet Ingredients (5 Minutes)
In another bowl, whisk together sugar, oil, eggs, buttermilk, vanilla extract, food coloring, and vinegar.
Mix until smooth.
4. Make the Batter (3 Minutes)
Gradually add the dry ingredients to the wet ingredients.
Mix gently until fully combined.
Avoid overmixing.
5. Fill the Cake Pans (2 Minutes)
Divide the batter evenly between the prepared pans.
Smooth the tops using a spatula.
6. Bake the Cake Layers (25–30 Minutes)
Bake until a toothpick inserted into the center comes out clean.
Allow the cakes to cool in the pans for 10 minutes.
7. Cool Completely (30 Minutes)
Transfer the cakes to a wire rack.
Allow them to cool completely before frosting.
8. Make the Frosting (5 Minutes)
Beat cream cheese and butter until smooth.
Gradually add powdered sugar and vanilla extract.
Continue beating until creamy and fluffy.
9. Assemble the Cake (10 Minutes)
Place one cake layer on a serving plate.
Spread frosting evenly over the top.
Add the second layer and frost the top and sides.
10. Decorate and Serve
Garnish with cake crumbs or white chocolate shavings.
Slice and serve.
Tips for Bakery-Style Red Velvet Cake
Measure Flour Correctly
Too much flour can create a dry cake.
Use the spoon-and-level method for accurate measurements.
Use High-Quality Cocoa Powder
Even though Red Velvet contains less cocoa than chocolate cake, quality cocoa still impacts flavor.
Cool Before Frosting
Warm cake layers can melt the frosting.
Allow the layers to cool completely before decorating.
Chill Before Slicing
Refrigerating the finished cake for 30 minutes makes slicing cleaner and easier.
Use Full-Fat Cream Cheese
Full-fat cream cheese produces the richest and creamiest frosting.
Avoid low-fat alternatives for best results.
Variations & Customizations
Classic Red Velvet Cake
Traditional red cake layers paired with cream cheese frosting create the timeless version everyone loves.
Red Velvet Cupcakes
Use the same batter to create cupcakes perfect for parties and celebrations.
Red Velvet Sheet Cake
Bake the batter in a rectangular pan for easy serving and simpler decoration.
Chocolate Red Velvet Cake
Add extra cocoa powder for a richer chocolate flavor while maintaining the classic red appearance.
Red Velvet Cheesecake Cake
Layer cheesecake between Red Velvet cake layers for an extra-indulgent dessert.
Internal Linking Opportunities:
- Chocolate Cake Recipe
- Vanilla Buttercream Frosting
- Cream Cheese Frosting Guide
- Cheesecake Recipe
- Chocolate Cupcakes
Storage & Reheating
Store Red Velvet Cake in an airtight container in the refrigerator for up to 5 days.
Because of the cream cheese frosting, refrigeration is recommended.
Before serving, allow slices to sit at room temperature for about 20 minutes for the best texture and flavor.
The unfrosted cake layers can be frozen for up to 3 months when wrapped tightly.
Frequently Asked Questions
Why is Red Velvet Cake red?
The red color comes from food coloring combined with cocoa powder and acidic ingredients like vinegar and buttermilk.
Does Red Velvet Cake taste like chocolate?
Red Velvet has a mild cocoa flavor, but it is less chocolatey than traditional chocolate cake.
Can I make Red Velvet Cake without buttermilk?
Yes. You can substitute milk mixed with lemon juice or vinegar, but real buttermilk produces the best texture.
Why is my Red Velvet Cake dry?
Overbaking, too much flour, or overmixing the batter can result in a dry cake.
Can I freeze Red Velvet Cake?
Absolutely. Wrap the cake layers tightly and freeze for up to 3 months before frosting.
Conclusion
Now that you know how to make Red Velvet Cake, you’re ready to create one of the most beautiful and delicious desserts right in your own kitchen. By using quality ingredients, proper mixing techniques, and creamy homemade frosting, you’ll achieve bakery-style results every time.
Whether you’re celebrating a birthday, holiday, or special occasion, this best Red Velvet Cake recipe is guaranteed to impress family and friends. Save the recipe, share it with fellow baking enthusiasts, and enjoy a slice of homemade Red Velvet Cake whenever the craving strikes.
Recipe Card Summary
Recipe Name: Easy Homemade Red Velvet Cake
Prep Time: 20 minutes
Cook Time: 30 minutes
Cooling & Decorating Time: 40 minutes
Total Time: 1 hour 30 minutes
Servings: 12
Calories: Approximately 580 calories per serving