Learn how to make authentic Thai Spring Rolls with crispy wrappers, flavorful vegetable filling, and delicious homemade sweet chili dipping sauce. Easy step-by-step recipe, expert cooking tips, variations, and serving ideas.
How to Make Thai Spring Rolls: The Complete Guide to Crispy, Flavorful, Restaurant-Style Thai Spring Rolls at Home
Introduction
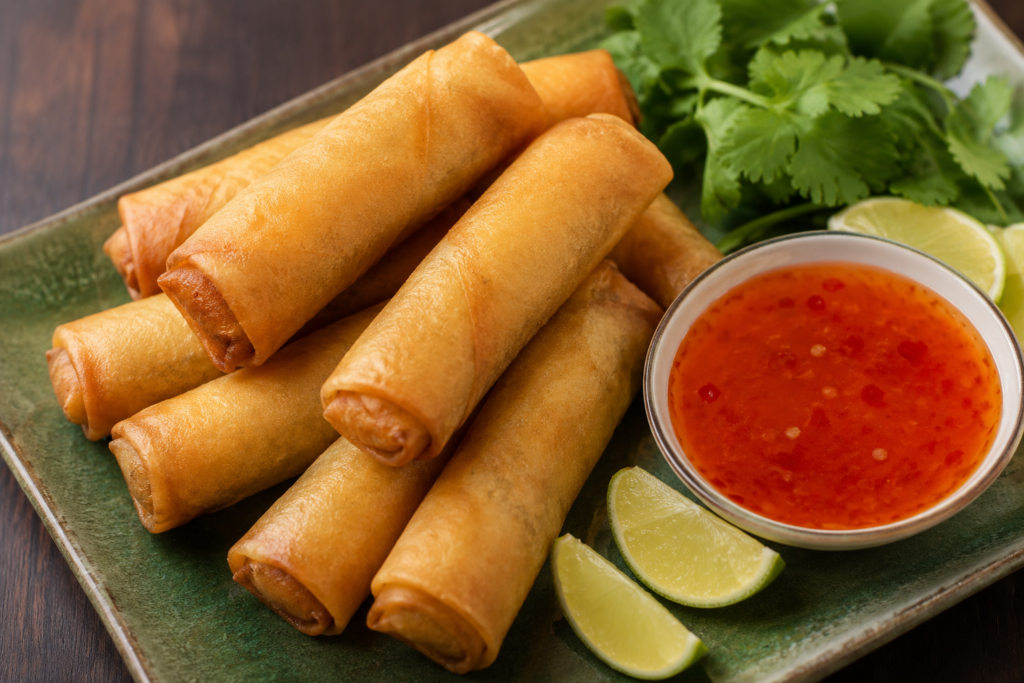
Thai Spring Rolls are one of Thailand’s most popular appetizers, loved for their perfectly crispy exterior and flavorful vegetable filling. Wrapped in thin pastry and fried until golden brown, these delicious rolls are filled with fresh vegetables, glass noodles, mushrooms, garlic, and aromatic seasonings. Served with sweet chili sauce, Thai Spring Rolls are a favorite at restaurants, family dinners, and festive celebrations.
If you’ve ever wondered how to make Thai Spring Rolls that are crispy, light, and packed with authentic Thai flavors, you’re not alone. Many home cooks struggle with soggy wrappers, bursting rolls, or oily results. Fortunately, with the right ingredients and a few simple techniques, making restaurant-quality spring rolls at home is easier than you might think.
In this complete guide, you’ll learn everything you need to know about preparing the perfect Thai Spring Rolls recipe. From choosing the right wrappers and preparing the filling to rolling, frying, and serving, we’ll cover every step. You’ll also discover expert cooking tips, delicious variations, storage recommendations, and answers to frequently asked questions.
Whether you’re preparing appetizers for a dinner party, a family gathering, or a complete Thai feast, these homemade Thai Spring Rolls deliver restaurant-quality flavor every time.
The Secret to Perfect Thai Spring Rolls
Restaurant-quality Thai Spring Rolls rely on a few important techniques.
Keep the Filling Dry
Excess moisture causes the wrappers to become soggy and may lead to bursting during frying.
Cook the vegetables until most of their moisture has evaporated.
Roll Tightly
A tightly rolled spring roll holds its shape while frying and prevents oil from entering the filling.
Seal the edges securely with a flour-and-water paste.
Fry at the Correct Temperature
Maintain the oil temperature at 350°F (175°C).
Oil that is too cool makes the rolls greasy, while oil that is too hot can burn the wrappers before the filling heats through.
Ingredients List
Serves 4–6
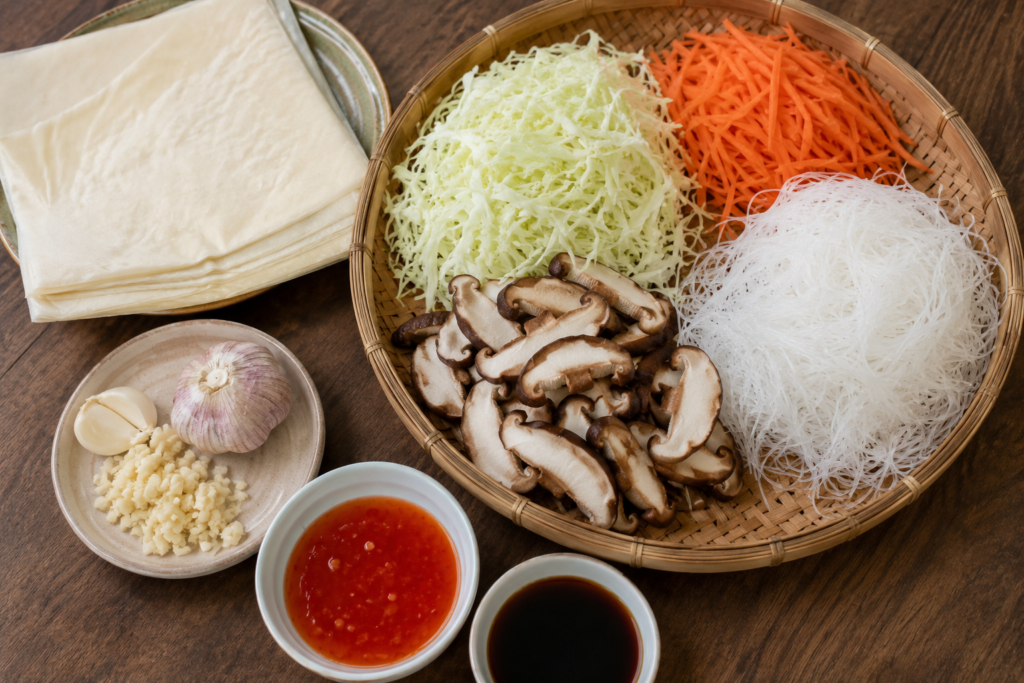
For the Spring Rolls
- 12 spring roll wrappers
- 2 tablespoons vegetable oil
- 2 garlic cloves, minced
- 1 small onion, finely chopped
- 2 cups shredded cabbage
- 1 cup shredded carrots
- 1 cup bean sprouts
- 1 cup mushrooms, finely chopped
- 2 ounces (60g) glass noodles, soaked and cut into short lengths
- 2 green onions, sliced
- 2 tablespoons soy sauce
- 1 tablespoon oyster sauce
- ½ teaspoon white pepper
- 1 teaspoon sesame oil
For Sealing the Wrappers
- 2 tablespoons all-purpose flour
- 2 tablespoons water
For Frying
- Vegetable oil (enough for deep frying)
For Serving
- Sweet chili sauce
- Fresh cilantro
- Lime wedges
- Sliced cucumber
Ingredient Substitutions
- Rice vermicelli can replace glass noodles.
- Shiitake mushrooms can replace button mushrooms.
- Tamari can replace soy sauce for a gluten-free option.
- Tofu can be added for extra protein.
- Shrimp or cooked chicken may be added for a non-vegetarian version.
Step-by-Step Instructions
1. Prepare the Filling (10 Minutes)
Heat vegetable oil in a large skillet over medium heat.
Cook the garlic and onion until fragrant.
Add the mushrooms, cabbage, carrots, and bean sprouts.
Cook until the vegetables soften and excess moisture evaporates.
2. Season the Filling (5 Minutes)
Add the soaked glass noodles, soy sauce, oyster sauce, white pepper, sesame oil, and green onions.
Stir well until everything is evenly combined.
Allow the filling to cool completely.
3. Prepare the Sealing Paste (2 Minutes)
Mix the flour and water until a smooth paste forms.
This will help seal the spring rolls securely.
4. Roll the Spring Rolls (15 Minutes)
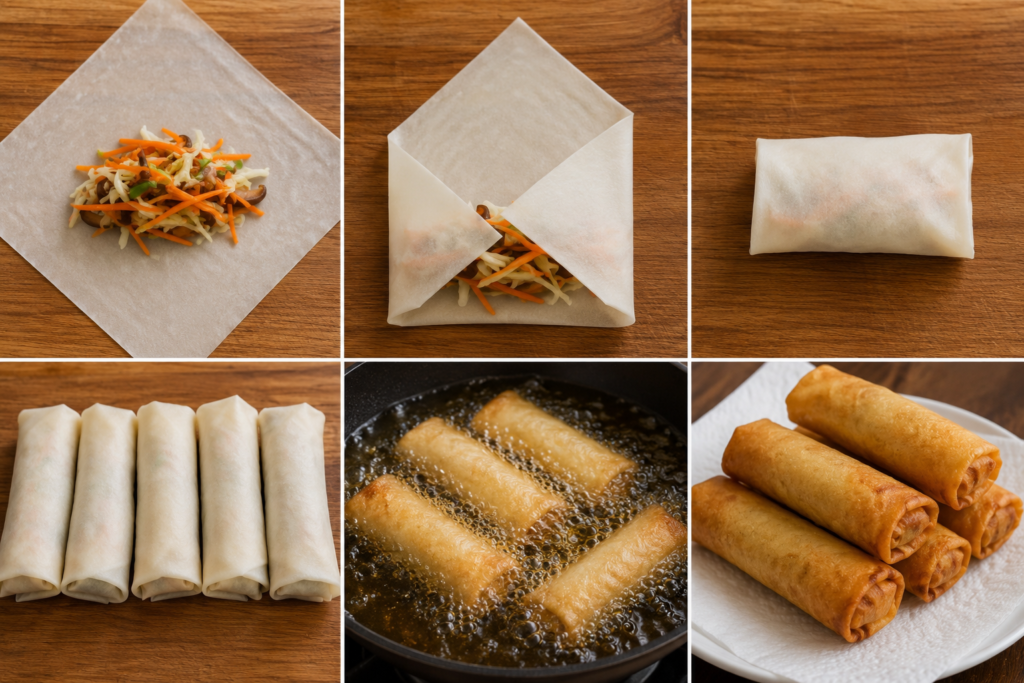
Lay one wrapper on a clean surface with one corner pointing toward you.
Place about two tablespoons of filling near the bottom corner.
Fold the bottom corner over the filling, fold in both sides, and roll tightly.
Brush the top corner with the flour paste and seal.
Repeat with the remaining wrappers.
5. Heat the Oil (5 Minutes)
Heat vegetable oil in a deep pot or fryer to 350°F (175°C).
6. Fry the Spring Rolls (6–8 Minutes)
Carefully place several spring rolls into the hot oil without overcrowding.
Fry until they become golden brown and crispy.
Turn occasionally for even cooking.
7. Drain
Transfer the cooked spring rolls to a plate lined with paper towels to remove excess oil.
8. Garnish and Serve
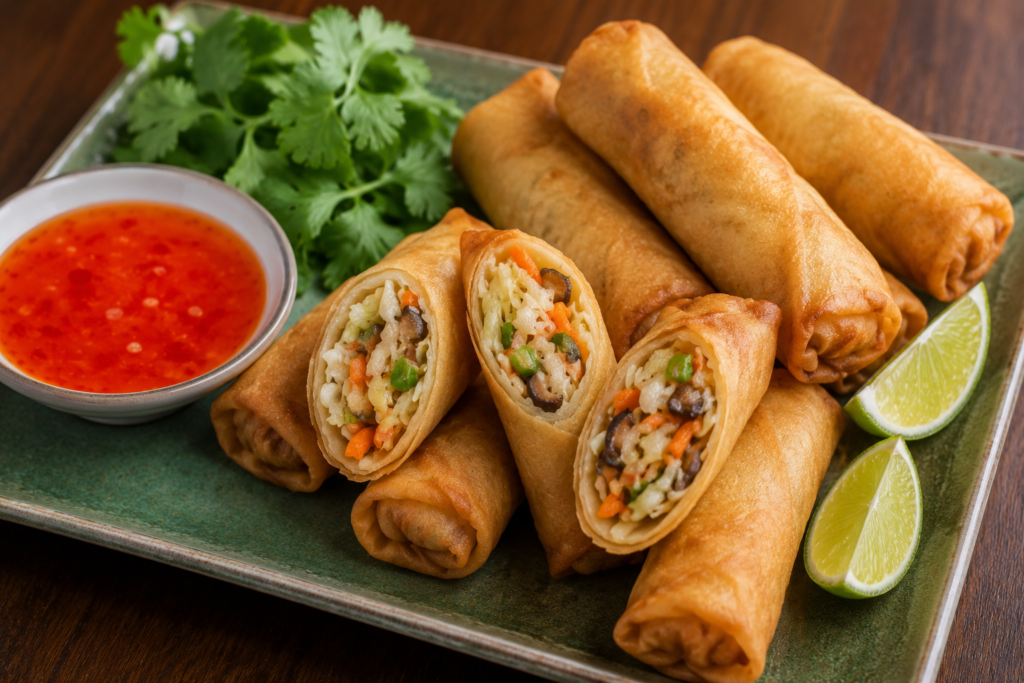
Arrange the crispy spring rolls on a serving platter.
Serve hot with sweet chili sauce, lime wedges, cucumber slices, and fresh cilantro.
Tips for Restaurant-Style Thai Spring Rolls
Cool the Filling
Warm filling creates steam inside the wrapper and can cause tearing.
Don’t Overfill
Using too much filling makes rolling difficult and increases the chance of bursting.
Fry in Small Batches
Avoid overcrowding the fryer to maintain the oil temperature.
Keep Wrappers Covered
Spring roll wrappers dry out quickly.
Cover them with a damp towel while working.
Serve Immediately
Freshly fried spring rolls have the crispiest texture.
Variations & Customizations
Classic Vegetable Thai Spring Rolls
Filled with cabbage, carrots, mushrooms, bean sprouts, and glass noodles.
Chicken Thai Spring Rolls
Add finely shredded cooked chicken to the filling.
Shrimp Thai Spring Rolls
Use chopped cooked shrimp for a delicious seafood version.
Tofu Spring Rolls
Add crumbled tofu for a vegetarian protein boost.
Air Fryer Thai Spring Rolls
Brush lightly with oil and air fry until crispy for a healthier option.
Internal Linking Opportunities:
- Tom Yum Soup Recipe
- Thai Green Curry Recipe
- Thai Crab Fried Rice Recipe
- Thai Beef Salad Recipe
- Fried Rice Recipe
Storage & Reheating
Store leftover Thai Spring Rolls in an airtight container in the refrigerator for up to 3 days.
Reheat in an oven or air fryer at 375°F (190°C) for about 8–10 minutes until crispy.
Avoid microwaving, as it softens the wrappers.
Uncooked spring rolls can be frozen for up to 2 months.
Fry directly from frozen, adding a few extra minutes to the cooking time.
Frequently Asked Questions
What’s the difference between Thai Spring Rolls and Egg Rolls?
Thai Spring Rolls use thin wrappers that become light and crispy, while egg rolls use thicker wrappers that create a heavier, bubbly texture.
Can I bake Thai Spring Rolls?
Yes. Brush them lightly with oil and bake at 400°F (200°C) until golden and crispy.
Can I make them ahead of time?
Absolutely. Assemble the spring rolls several hours ahead and refrigerate them until ready to fry.
Why did my spring rolls burst while frying?
They were likely overfilled, rolled too loosely, or the filling contained too much moisture.
What dipping sauce goes best with Thai Spring Rolls?
Sweet chili sauce is the traditional choice, but peanut sauce or spicy garlic sauce also pair wonderfully.
Conclusion
Now that you know how to make Thai Spring Rolls, you can recreate one of Thailand’s most popular appetizers in your own kitchen. By preparing a flavorful filling, rolling the wrappers tightly, and frying them until perfectly golden, you’ll achieve crispy, restaurant-quality spring rolls every time.
Whether you’re serving them as an appetizer, snack, or part of a larger Thai feast, this best Thai Spring Rolls recipe is guaranteed to impress family and friends. Save this recipe, share it with fellow food lovers, and enjoy homemade Thai Spring Rolls whenever you’re craving a delicious, crispy treat.
Recipe Card Summary
Recipe Name: Easy Homemade Thai Spring Rolls
Prep Time: 30 minutes
Cook Time: 15 minutes
Total Time: 45 minutes
Servings: 4–6
Calories: Approximately 290 calories per serving